Introduction:
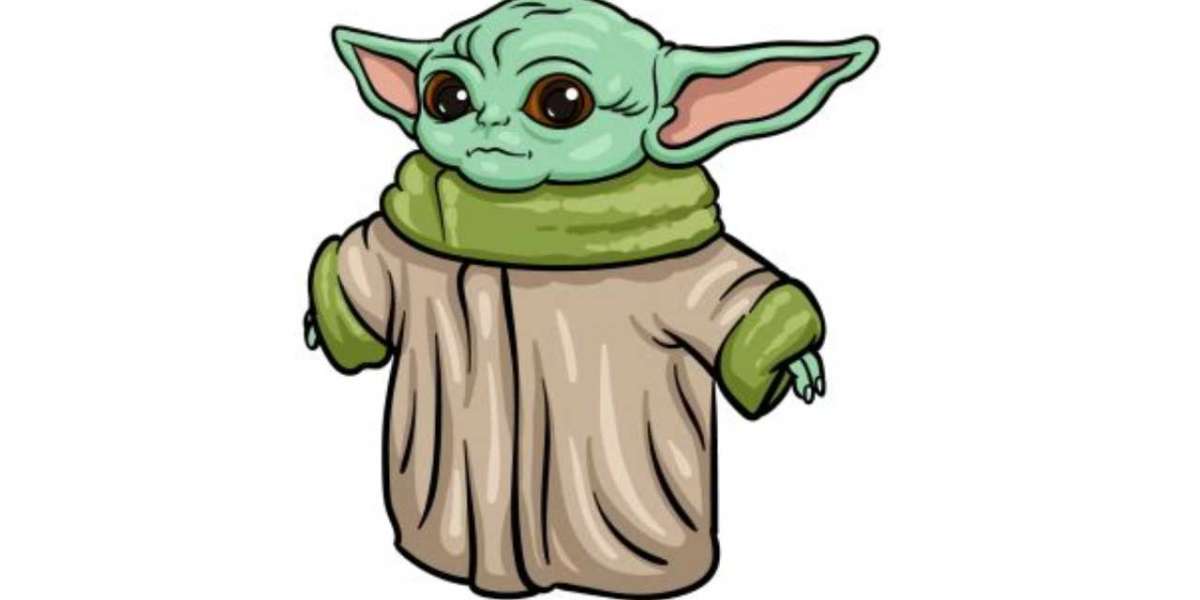
Draw Baby Yoda: The charming person known as Baby Yoda, Grogu, from the Star Wars universe, has caught the hearts of fans worldwide. With his huge eyes, larger-than-usual ears, and guiltless articulation, Baby Yoda has become a social peculiarity. If you love artistry and Star Wars, figuring out how to draw Baby Yoda can be magnificent. In this bit-by-bit guide, we will walk you through the most common way of catching the substance of this darling person on paper.
Also, check out our free Turkey coloring pages.
Materials You'll Need
Before you set out on your Baby Yoda drawing venture, ensure you have the vital materials prepared. You'll require this:
Drawing Paper: Pick a great drawing paper that suits your favored medium. A heavier paper will keep the ink from seeping through and give a steady surface to your drawing.
Pencils: You'll require various pencils with various hardness levels. A set incorporating HB, 2B, 4B, and 6B pencils is great. These pencils range from hard (light lines) to delicate (dim lines).
Eraser: A decent-quality eraser will assist you with revising botches and accomplishing clean lines.
Fine-tip Pens: Fine-tip fine-tip pens or specialized pens are suggested for inking or illustrating your drawing for inking or illustrating your drawing.
Markers or Shaded Pencils: To add tone to your Baby Yoda drawing, having markers or hued pencils close by is really smart.
Reference Picture: Find an unmistakable reference picture of Baby Yoda to direct you through the drawing system.
Stage 1: Fundamental Shapes
Begin by gently portraying the essential shapes that will act as the system for your Baby Yoda drawing. Start with an oval shape for the head and a marginally bigger oval for the body. Baby Yoda has an adjusted and bulky appearance, so keep the shapes delicate and delicate.
Stage 2: Eyes and Ears
Baby Yoda's eyes are perhaps his most particular element. Draw two huge, round eyes close to the highest point of the head. Leave adequate room between the eyes for the nose and mouth. Add two extended, sharp ears on one or the other side of the head. The ears should begin around the highest point of the eyes and broaden upwards.
Stage 3: Facial Subtleties
Presently, we should deal with the facial highlights. Draw two little circles inside each eye to address the understudies. Add a bent line over each eye to characterize the upper eyelids. Draw a little, bent line for the nose beneath the space between the eyes. Baby Yoda has a minuscule, grinning mouth, so utilize a delicate bend to make his demeanor.
Stage 4: Body and Attire
Sketch the arms and hands of Baby Yoda. His arms are short and end in three-fingered hands. Then, draw the neckline of his robe around the neck region. Baby Yoda wears a straightforward robe with a hood, which delicately frames the state of the robe around the body.
Stage 5: Robe Subtleties
Add the folds and wrinkles to the robe to give it a surface and profundity. Utilize bent lines to propose the hanging of the texture. Make sure to keep the lines delicate and natural, as Baby Yoda's robe is free and agreeable.
Stage 6: Finish the Layout
Cross your primer lines with a hazier pencil or a fine-tip pen to settle the framework of your drawing. Be specific about which lines you must accentuate, zeroing in on the fundamental highlights and subtleties.
Stage 7: Inking
You can continue to ink your drawing if you know your layout. Utilize a fine-tip pen or a specialized pen to follow the lines cautiously. Inking gives your drawing a spotless, clean look.
Stage 8: Adding Shadows and Concealing
To add profundity and aspect to your Baby Yoda drawing, begin concealing. Distinguish the regions where shadows normally fall, like the robe's folds and the ears' underside. Utilize a scope of pencils (2B, 4B, 6B) to make fluctuating levels of dimness. Mix the concealing with a mixing device or your finger to accomplish smooth changes between light and shadow.
Stage 9: Fine Subtleties
Focus on the little subtleties that make Baby Yoda remarkable. Add a surface to the ears by gently concealing the inward parts. Characterize the kinks on his brow and the forms of his face. Remember to add a couple of lines to propose the fur on his head.
Stage 10: Variety
To add tone to your drawing, markers or shaded pencils can rejuvenate Baby Yoda. Match the varieties as intently as conceivable to the reference picture. Begin with light layers of variety and slowly develop the power.
Stage 11: Last Contacts
Make a stride back and evaluate your drawing. Make any vital changes, refine the overshadowing, and guarantee that all extents are precise. Whenever you're fulfilled, you've effectively caught the embodiment of Baby Yoda on paper!
End:
Drawing Baby Yoda requires persistence, tender loving care, and practice. Be encouraged if your most memorable endeavor isn't as careful as you trusted. Craftsmanship is an excursion, and each drawing you make will add to your development as a craftsman. Thus, continue working on, testing, and, in particular, have some good times rejuvenating this dearest character through your craft! For more information, please Click Here!