Setting up a Netgear EX3700 WiFi extender doesn’t have to be a daunting task. In this guide, we’ll explore three different methods to ensure a seamless and reliable setup process, helping you extend the reach of your home network effortlessly. For expert assistance with your Netgear EX3700 setup, call us at +1(855)-201-8071 our dedicated support team today. We’re here to guide you through the process and ensure a smooth and successful setup. Say goodbye to setup frustrations and hello to seamless connectivity!
Method 1: Netgear EX3700 Setup using Web Browser
Step 1: Physical Placement and Power On
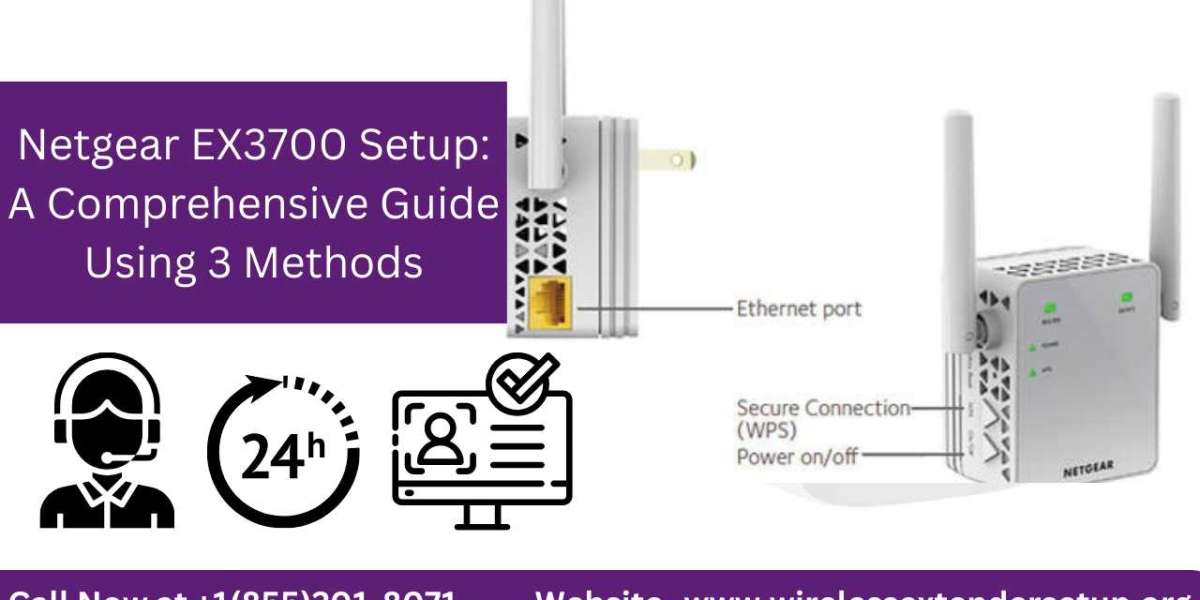
Place the EX3700 within the range of your existing WiFi router. Plug it into a power outlet and wait for the LED lights to stabilize.
Step 2: Connect to the Extender
On your device, scan for available WiFi networks. Look for the default SSID (network name) of your extender, usually “NETGEAR_EXT.” Connect to it.
Step 3: Access the Web Interface
Open a web browser and enter “www.mywifiext.net” in the address bar. This will take you to the Netgear extender setup page.
Step 4: Complete the Setup Wizard
Follow the on-screen instructions to set up your extender. You’ll need to select your existing WiFi network and provide the password. Once configured, create a new WiFi SSID and password for the extender.
Method 2: Netgear EX3700 Setup using Netgear Nighthawk App
Step 1: App Installation
Download and install the Netgear Nighthawk app from your device’s app store.
Step 2: Extender Connection
Connect to the default WiFi network of the extender (“NETGEAR_EXT”).
Step 3: Add Device
Launch the Nighthawk app and tap “Add Device.” Follow the prompts to set up the extender. The app will guide you through connecting to your existing WiFi network and creating a new extender WiFi network.
Method 3: Netgear EX3700 Setup using WPS Button
Step 1: WPS-Compatible Router
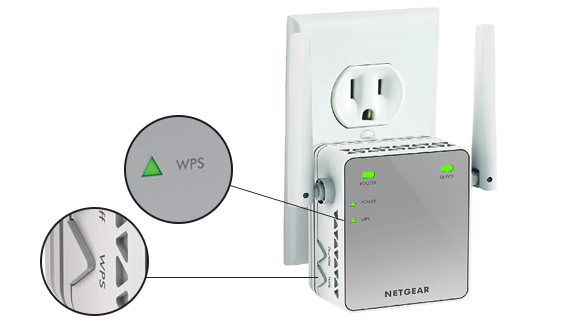
Ensure your main router supports WPS (WiFi Protected Setup).
Step 2: Extender Placement
Place the extender and plug it in within range of your router.
Step 3: WPS Activation
Press the WPS button on the router, followed by the WPS button on the extender within two minutes. The LEDs on both devices should confirm a successful connection.
Step 4: Connect Devices
Your extender is now set up. Connect your devices to the new extender WiFi network using the SSID and password you’ve set.
Conclusion:
With the Netgear EX3700 WiFi extender, expanding the coverage of your home network has never been easier. Whether you prefer the web browser setup, the convenience of the Nighthawk app, or the simplicity of WPS, you can choose the method that suits you best. No matter which method you opt for, you’ll soon be enjoying enhanced connectivity and network coverage throughout your home.
Source Link: https://www.wirelessextendersetup.org/netgear-ex3700-setup/